
20 Easy Clay Crafts for Kids to Make in 2025
You can spark creativity with 20 easy clay crafts for kids in 2025 using clay you already have at home! Make animal faces by rolling and pinching clay for features, create zoo animals or colorful birds, and even shape tiny habitats.
Try molding mythical creatures, fairy houses, or playful gnomes. Decorate pots, make garden markers, or press leaves and pinecones for fun textures. There’s also simple jewelry, mosaics, and nature-inspired crafts to try—let’s explore some favorites next!


20 Easy Clay Crafts for Kids to Make in 2025: You can spark creativity with 20 easy clay crafts for kids in 2025 using clay you already have at home!. Make animal faces by rolling and pinching clay for features, create zoo animals or colorful birds, and even shape tiny habitats.
1. Clay Animal Faces

Clay animal faces are a fun and simple way for kids to get creative with their hands.
Kids can explore their creativity and imagination by making adorable animal faces out of clay.
- Start by choosing air dry clay, polymer clay, or Crayola Model Magic.
- Roll the clay into a ball for the face.
- Pinch small pieces for ears, noses, and mouths.
- Use a toothpick or a clay shaper to add nostrils and smiles.
- Create eyes with beads or tiny clay balls.
- Add felt for masks or yarn for fuzzy fur.
- Attach details with glue.
- When dry, use paint or markers to add color.
Try different animals—each step lets you invent and personalize your creation!
2. Zoo Figure Creation
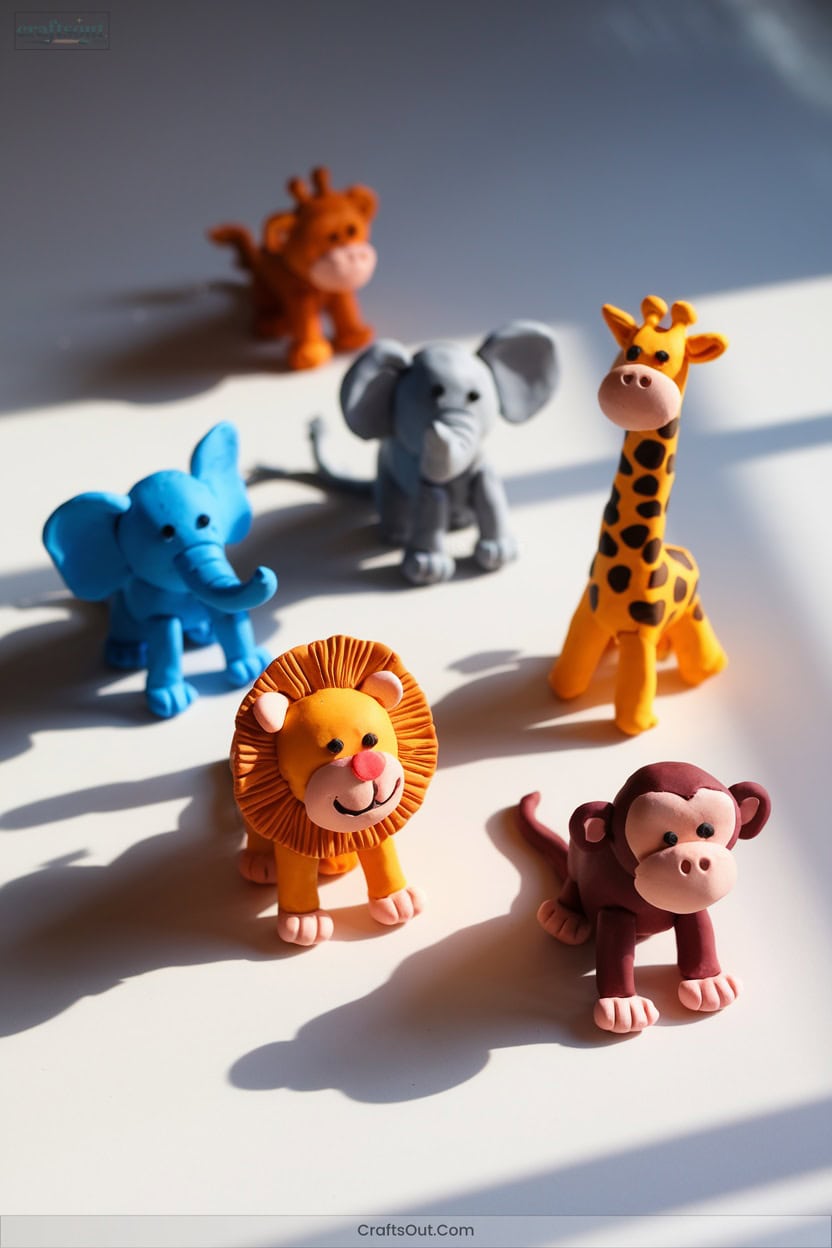
Once you’ve tried making animal faces, you can have even more fun by shaping whole zoo figures.
Start with polymer clay in bold colors.
Form a lion by rolling orange clay for the mane and yellow for the body, then add expressive details. Make a playful monkey by shaping brown clay with long arms and a curly tail. Sculpt a tall giraffe using brown clay and add yellow spots. For an elephant, use gray clay with big ears and a trunk. Create a zebra with black and white stripes.
Use simple tools for details, and bake your creations to finish.
3. Birds and Insects Sculptures

A fun way to explore nature with kids is by making birds and insects out of clay.
Start by choosing bright colors of air-drying clay or play-doh. Shape simple Blue Jays or Cardinals by rolling clay into ovals for bodies, then pinch small wings and beaks.
Try insects next—roll green clay for a caterpillar, or use red and black for a ladybug. Add eyes and antennae with tiny pieces.
Encourage kids to mix colors, experiment with poses, and add details using paint or glitter.
Display their creations proudly. You’ll spark creativity and teach them about wildlife in a hands-on way.
4. Animal Habitats in Miniature

Imagine building your own tiny world with just a few simple steps—miniature animal habitats let you do exactly that.
Start by choosing air-dry or polymer clay and colors matching your chosen habitat: forest, desert, ocean, arctic, or jungle.
Shape basic animals and habitat features like rocks or plants using small tools or toothpicks.
Layer clay to create realistic environments, then add natural textures with felt or fabric.
Once assembled, let the pieces dry or bake them as needed.
Display your finished habitats as playful decor, storytelling props, or interactive learning tools.
You’ll boost creativity, STEM skills, and environmental awareness!
5. Mythical Creature Models
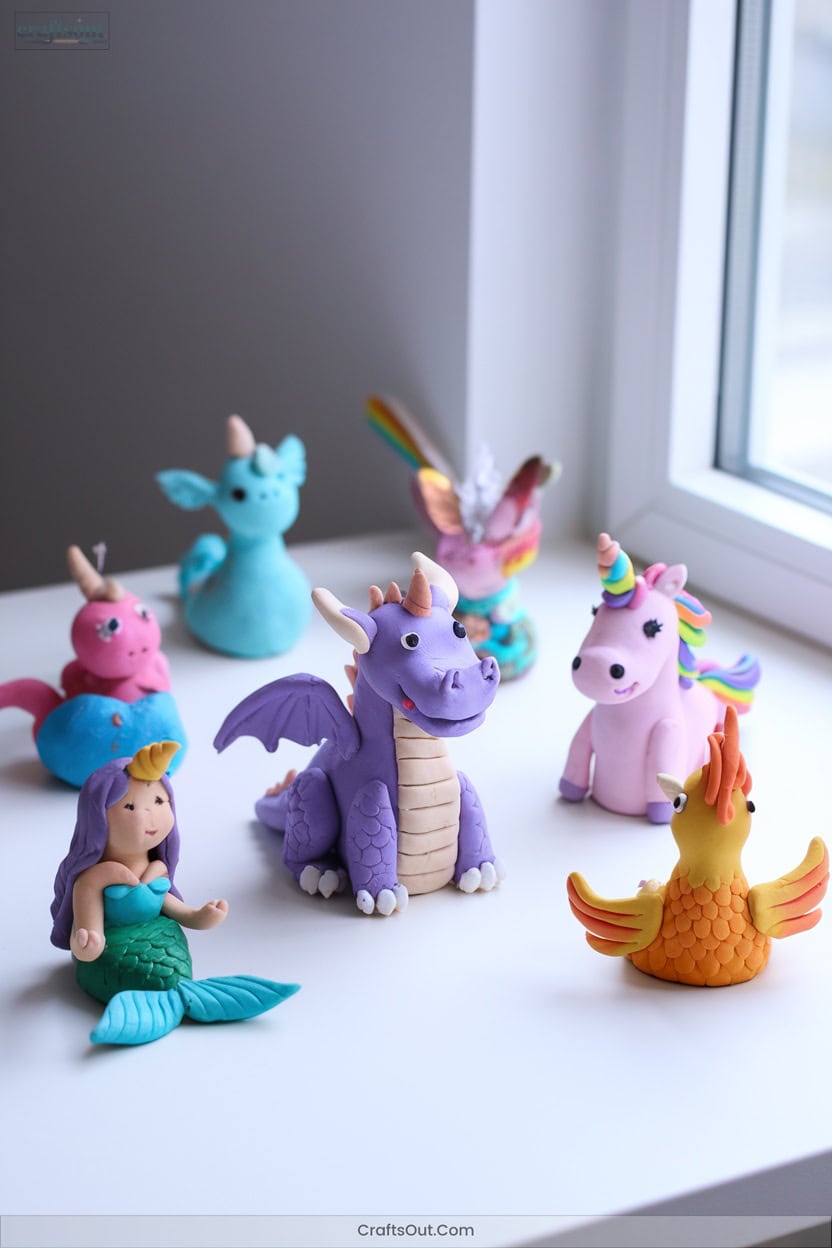
After creating tiny animal habitats, you can let your imagination soar by making your own mythical creature models.
Start with a craft kit that includes plastic skeletons of dragons, unicorns, and phoenixes.
Cover the skeletons with non-drying clay in bold colors, shaping wings, horns, or tails using the modeling tools.
Add feathers or wiggly eyes for extra flair.
Try glitter or stickers for more customization.
Watch a YouTube tutorial if you need ideas or join a crafting community online.
Remember to be patient—practice makes perfect!
When you’re done, display your magical creatures and celebrate your unique creations.
6. Succulent Pinch Pots
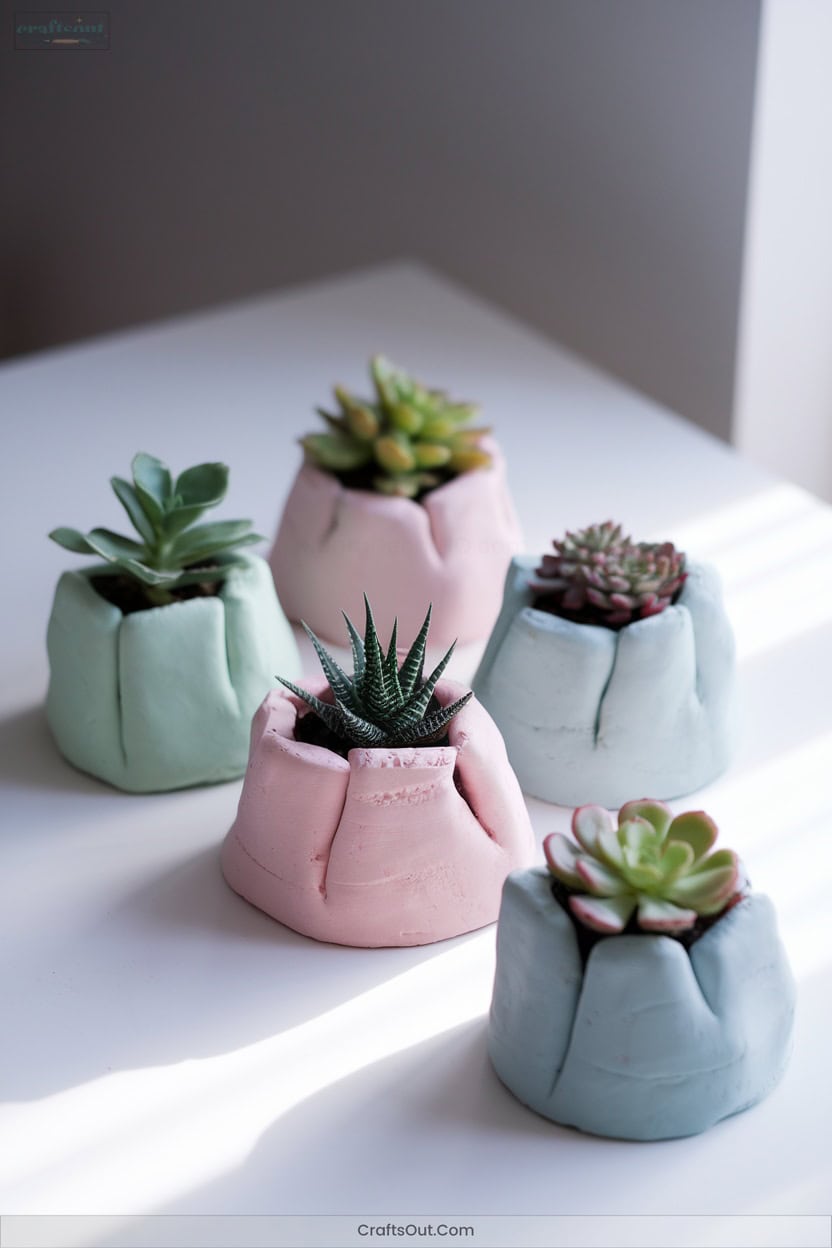
Craft time gets even more fun when you make your own succulent pinch pots.
Start by kneading colorful clay until it’s soft.
Roll the clay into ropes or balls, then braid or blend colors for a unique look.
Shape a ball, press your thumb in the center, and pinch the walls to form a small pot.
Get creative—try marbling, layering, or adding fun patterns.
Air-drying clay needs to dry naturally, while oven-bake clay goes in the oven.
Add glaze or paint for extra flair.
Always work on a clean surface and ask an adult for help when needed.
7. Mini Herb Pots
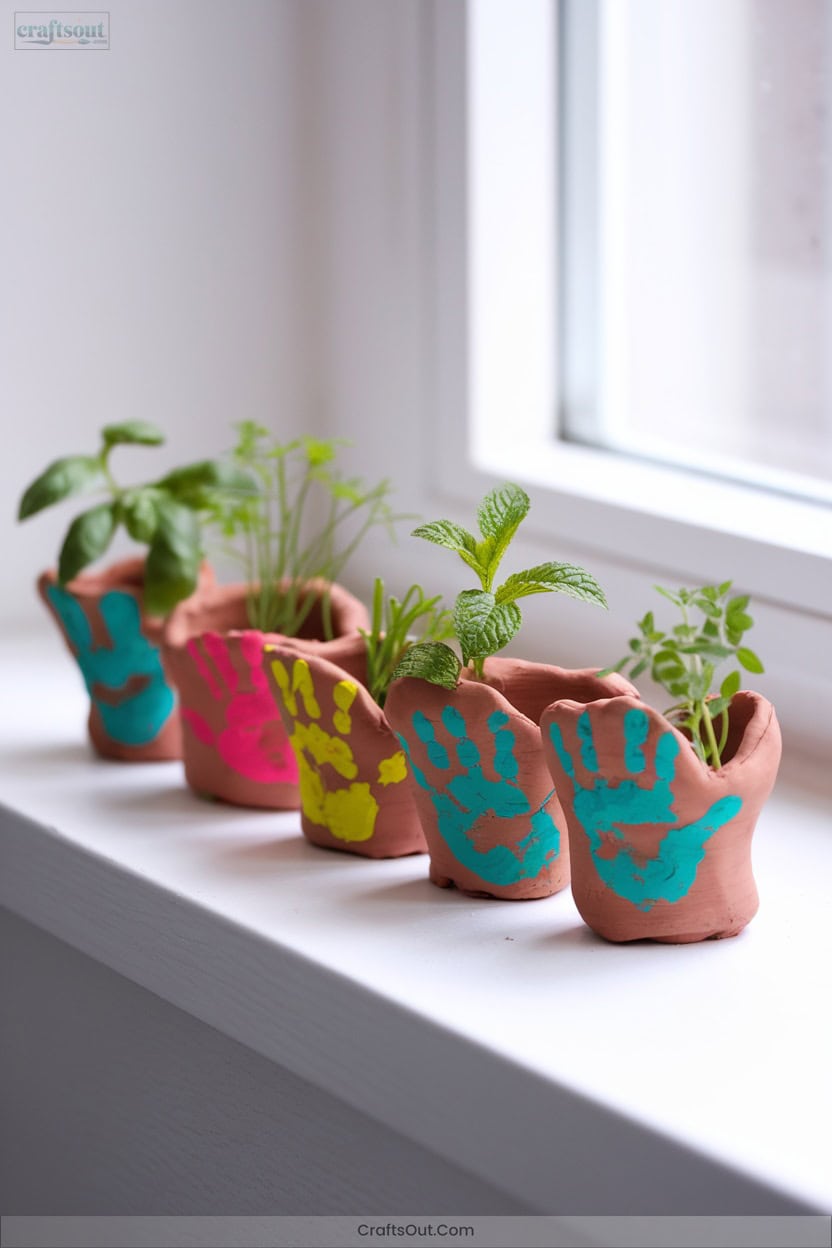
Once you’ve enjoyed making succulent pinch pots, try shaping your own mini herb pots.
Grab some air dry clay and mold it around mini clay pots, creating fun faces or patterns.
Let them dry, then decorate with paint or markers.
Choose small herbs like basil or mint and plant them in your pots.
Add pebbles on top for drainage and style.
Place your mini herb pots on a windowsill for easy access and a pop of creativity.
You’ll learn about growing herbs and caring for plants, all while designing something unique.
These make fantastic gifts and creative displays for any space.
8. Flower Pots for Kids

Flower pot decorating is a fun way for kids to combine art and gardening.
Start by picking a terra cotta or ceramic pot.
Use acrylic paints and stencils to add names or patterns.
Try tissue paper for bold, colorful effects—just brush on Mod Podge and smooth the paper over the pot.
Want extra flair? Wrap fabric scraps around with Mod Podge and let them dry.
Don’t forget to seal your design with a clay pot sealer!
You’ve just made a unique planter, perfect for gifting or planting seeds.
This hands-on project sparks creativity and teaches kids about caring for plants.
9. Decorative Planter Ornaments

After decorating your pots, you can bring even more personality to your plants with handmade clay ornaments.
Handmade clay ornaments are a playful way to add extra charm and personality to your plant pots.
Mix baking soda, cornflour, and warm water to create easy clay.
Head outside for a nature walk and gather leaves, twigs, or flowers for inspiration.
Roll out your clay and use cookie cutters or your hands to shape it.
Press natural materials into the surface for unique textures.
Let kids experiment with marbling or vibrant acrylic paints.
Poke a hole for string or twine so you can hang your ornaments around planters.
Every ornament adds a creative, innovative touch to your space!
10. Garden Marker Creations

Transform your garden into a colorful learning space by crafting your own clay garden markers.
Start by rolling air-dry clay to ¼-inch thick on a baking mat. Use cutters or jar lids for shapes—try circles, rectangles, or even vegetable outlines.
Cut strips with pointed ends for easy soil placement. Gently smooth edges with water.
Press alphabet stamps to label each marker.
Once dry, paint with watercolors or apply clay glaze for extra color and durability.
Let kids pick colors or create themed sets for herbs or veggies.
These custom markers make plant identification fun and keep your garden organized and bright!
11. Leaf Impressions in Clay
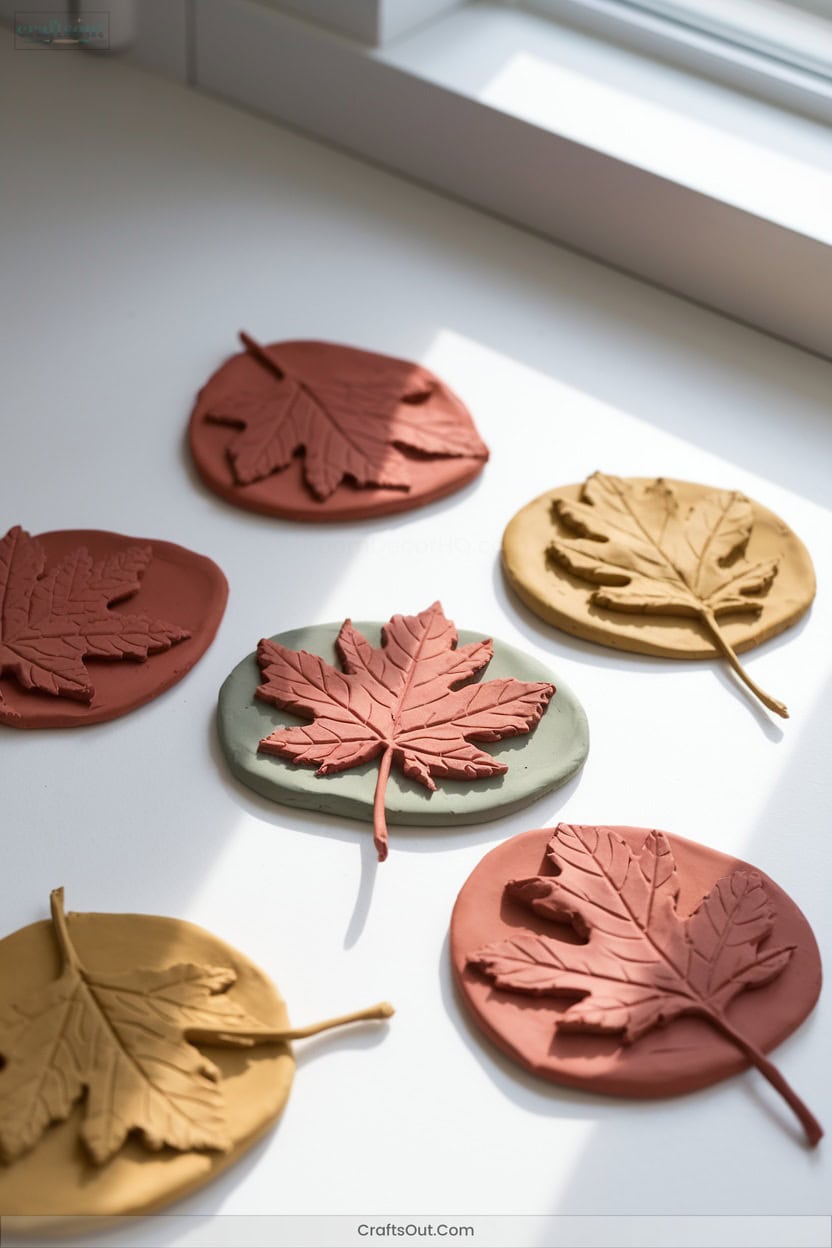
Bring a touch of nature indoors by making leaf impressions in clay with your kids.
Start by rolling air dry clay on wax paper until it’s flat.
Pick fresh, textured leaves and press the veined side into the clay using your fingers or a rolling pin.
Gently peel off the leaf to reveal the imprint.
Use a clay tool to cut around the shape, smoothing sharp edges with water.
Experiment by arranging different leaves for unique designs.
Let the clay dry completely.
For extra flair, paint your leaf impressions with metallic acrylics. Try adding a hole if you’d like to hang them!
12. Pinecone Clay Decorations

Ever wondered how to turn simple pinecones into adorable decorations?
Start by grabbing air-dry clay and a few pinecones.
Mold clay into shapes like animal snouts, paws, or festive details.
Attach these pieces to pinecones using clear glue or floral wire for extra hold.
Use a Sharpie or paint to add features like eyes or noses.
Try stamping pinecones into clay to make unique textured ornaments.
Experiment with white paint or glitter for a wintry look.
This creative craft teaches you about nature, encourages sensory play, and is perfect for family projects.
Let your imagination shape each pinecone masterpiece!
13. Painted Nature Rocks

After making pinecone decorations, you can keep exploring nature crafts by painting rocks.
First, gather smooth rocks and wash them well. Let them dry. Brush on a base coat of acrylic paint.
Once dry, get creative—try leaf prints, floral patterns, or abstract landscapes. Use markers or fine brushes for details, and layer colors for depth. Stamp with leaves for unique textures or use masking tape for crisp lines.
When finished, seal your design with Mod Podge.
Painted rocks work great as garden decorations, game pieces, gifts, or even educational tools.
You’ll build creativity, fine motor skills, and nature appreciation!
14. Nature Collage Art
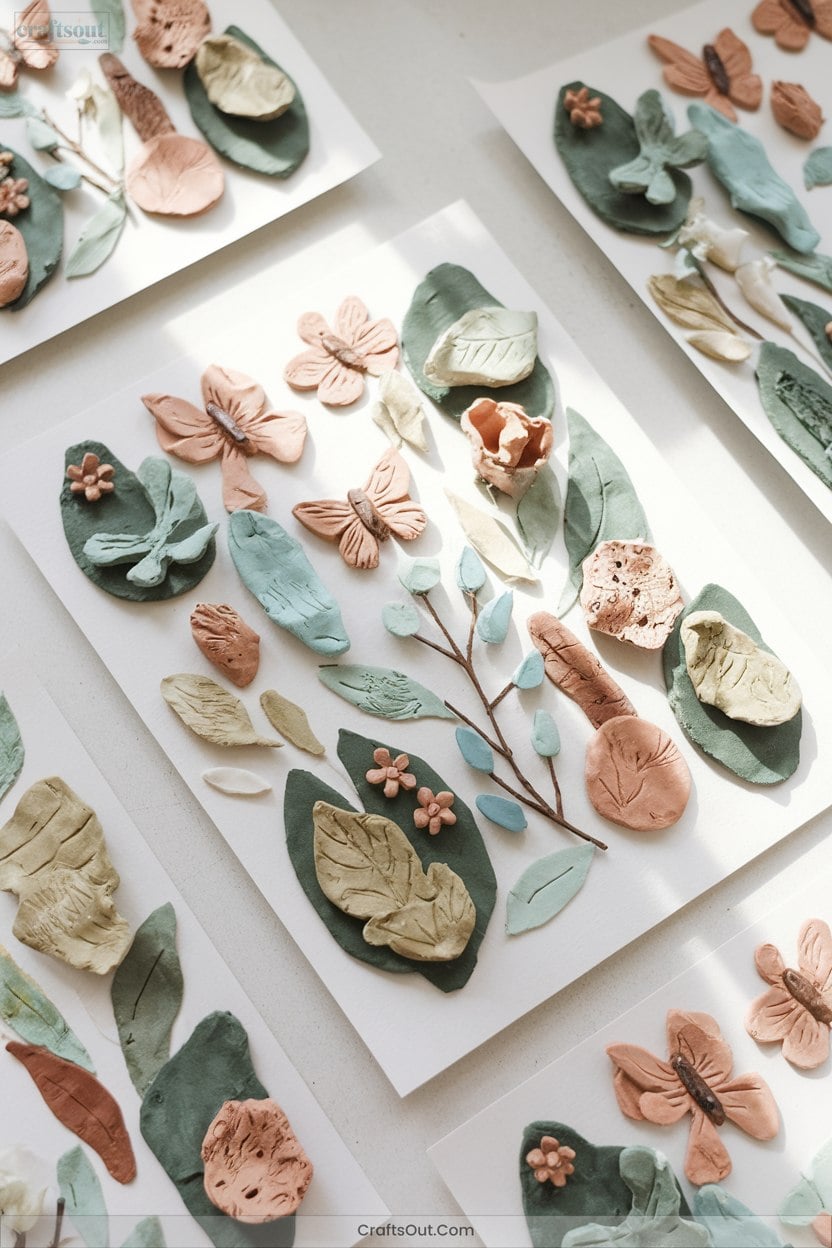
Start your nature collage by heading outside for a nature walk and collecting interesting materials like leaves, flowers, twigs, and pebbles.
Once you’re back, choose a base—cardboard or construction paper works well.
Arrange your finds in creative patterns.
Press flat items onto sticky contact paper, or use glue to attach 3D pieces like pebbles for bold texture.
Try rubber bands for temporary, changeable designs.
Display your collage in a sunny window or on your wall.
Each piece becomes a unique mix of color, shape, and texture—perfect for experimenting and learning about nature while sparking your artistic imagination.
15. Seashell-Inspired Crafts
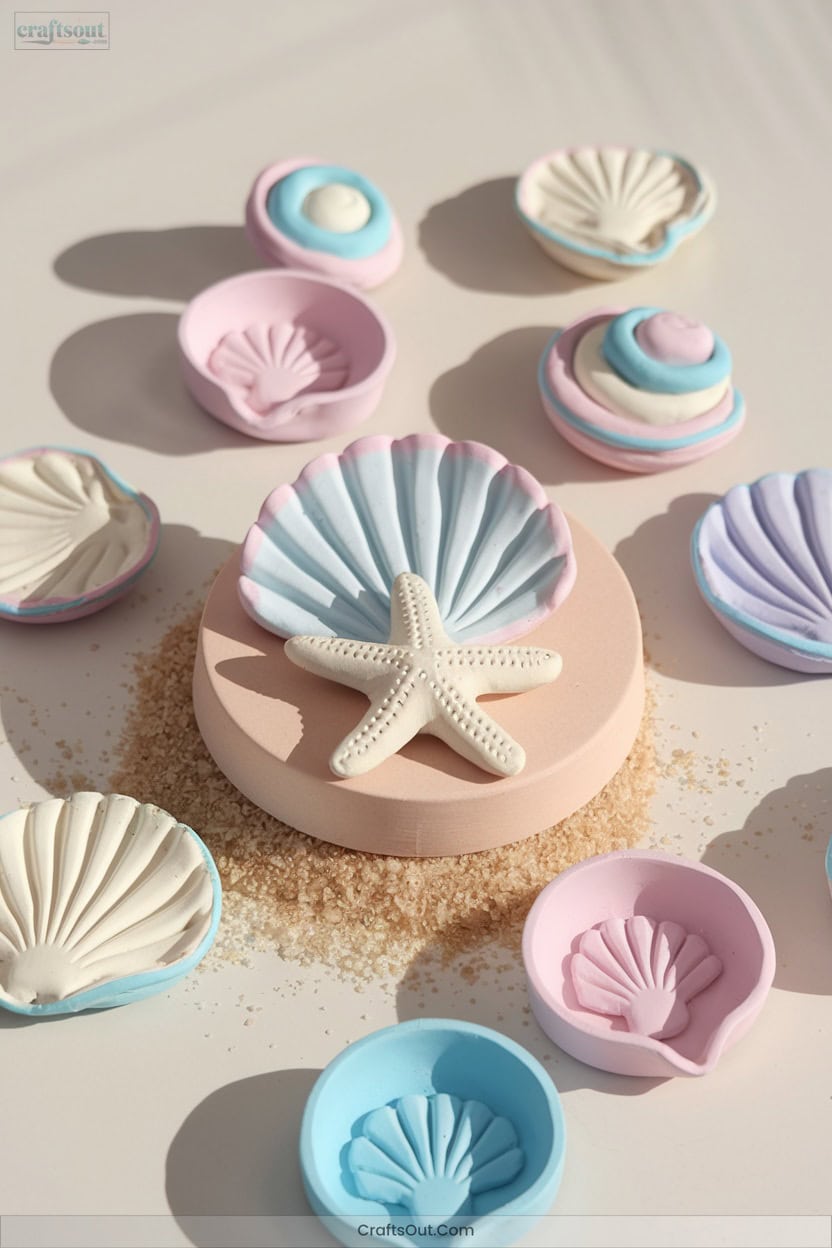
Exploring nature doesn’t have to end with leaves and twigs—you can also create beautiful art with treasures from the beach.
Gather seashells from your next outing, then press them into air-dry or homemade sand clay for unique shell impressions.
Try building 3D sculptures by arranging shells on and in the clay.
Paint your shells with bright colors to make your artwork pop.
Let kids explore textures by mixing shells, sand, and clay, encouraging them to create freely.
Personalize projects with names for special keepsakes.
These crafts boost creativity, fine motor skills, and help kids connect with nature in innovative ways.
16. Fairy Houses From Clay
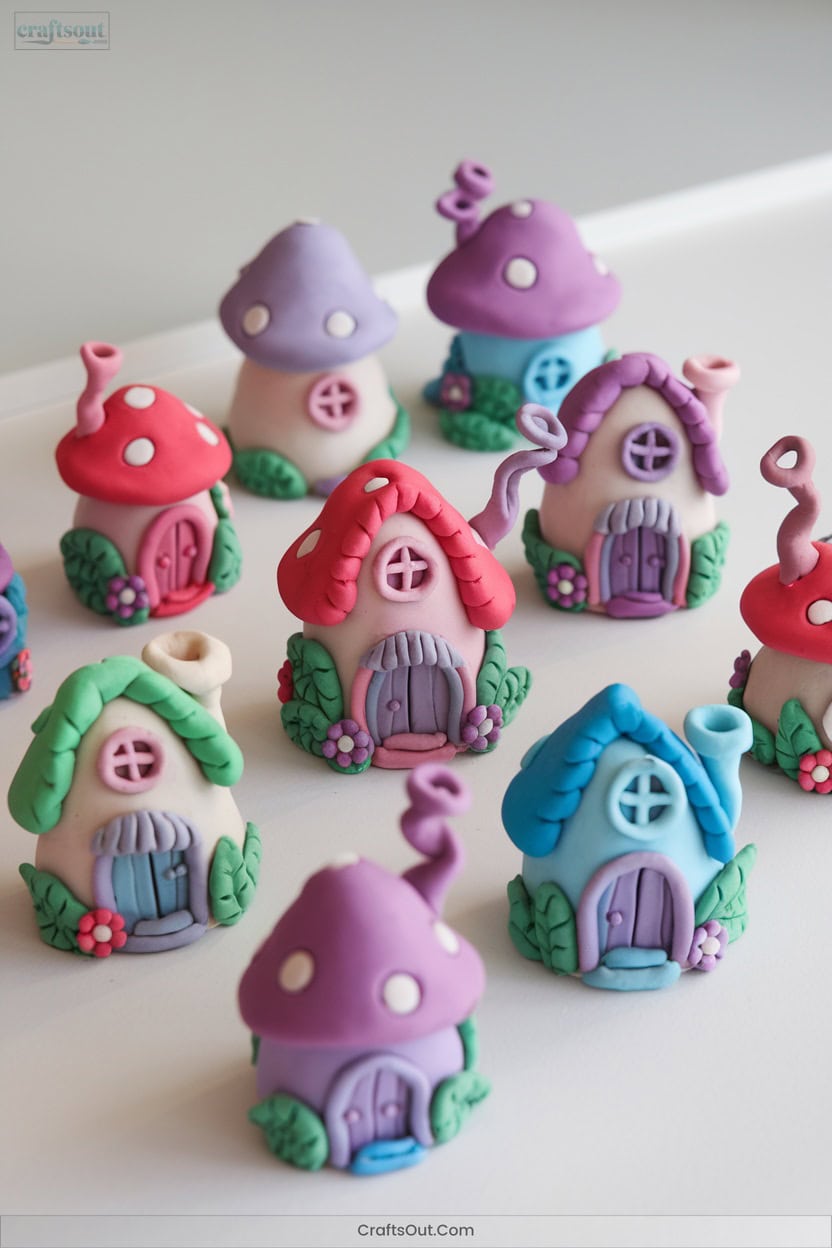
Fairy houses spark imagination and creativity, letting kids transform simple clay into magical little homes.
Fairy houses invite children to turn ordinary clay into enchanting dwellings, igniting creativity and magical storytelling in every tiny detail.
Start with a palm-sized chunk of air dry clay and flatten it on a wooden board.
Shape walls by rolling out clay and tracing stencils with a wooden skewer.
Form a semi-circle roof, then attach walls and roof together, smoothing joints with damp fingers.
Press leaves or sticks into the clay for texture.
Add details—glitter, beans, feathers, or shell pasta for unique flair.
Let it dry, then display your fairy house proudly.
Adult help makes assembly easier.
Every house is a new adventure!
17. Gnome Village Creations
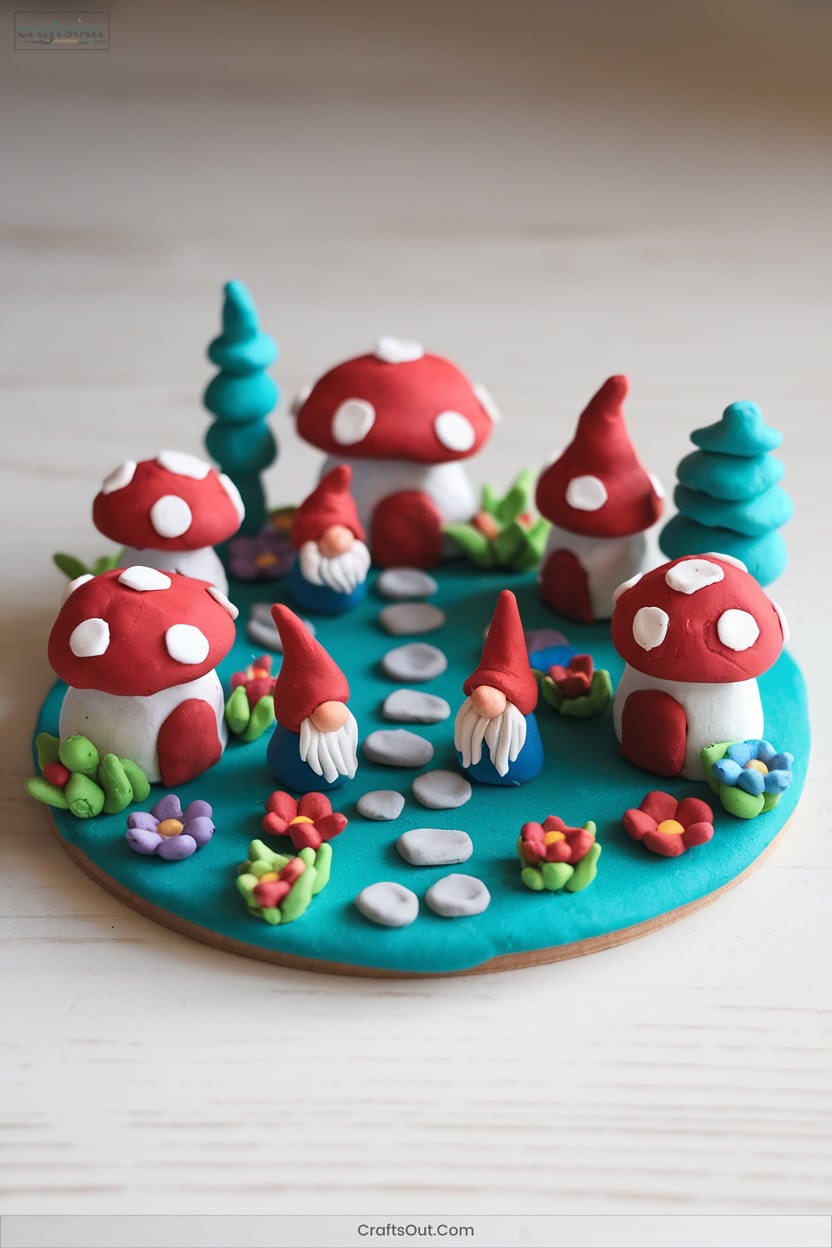
A gnome village is a delightful way for kids to bring their own tiny world to life with clay.
Start by protecting your table with a silicone mat. Pick four clay colors to inspire creativity.
Knead air dry or foam clay until smooth. Shape a sphere for the body, then roll a cone for the hat.
Add a clay snake for the brim and a small ball for the nose. Use toothpicks to make beard textures or details.
Attach all pieces with slip. Let each gnome dry.
Try seasonal themes, and arrange your colorful gnomes together for a magical village display!
18. Elf Door Designs

Magic comes alive when you craft your own elf door from clay.
Bring a touch of enchantment to your home by shaping your own whimsical elf door from clay.
Start by choosing a base—try a flat dish or tile.
Mold polymer or air dry clay into a door frame, pressing in details like keyholes and knobs.
Use bright paints for color, and add natural touches like twigs or moss.
Attach tiny stones or shells for extra charm.
Want more magic? Add a small LED light to the scene.
Remember, adult supervision helps keep things safe and fun.
This project sparks creativity and lets you invent new designs for every season.
Share your unique elf doors with craft communities!
19. Clay Jewelry and Pendants
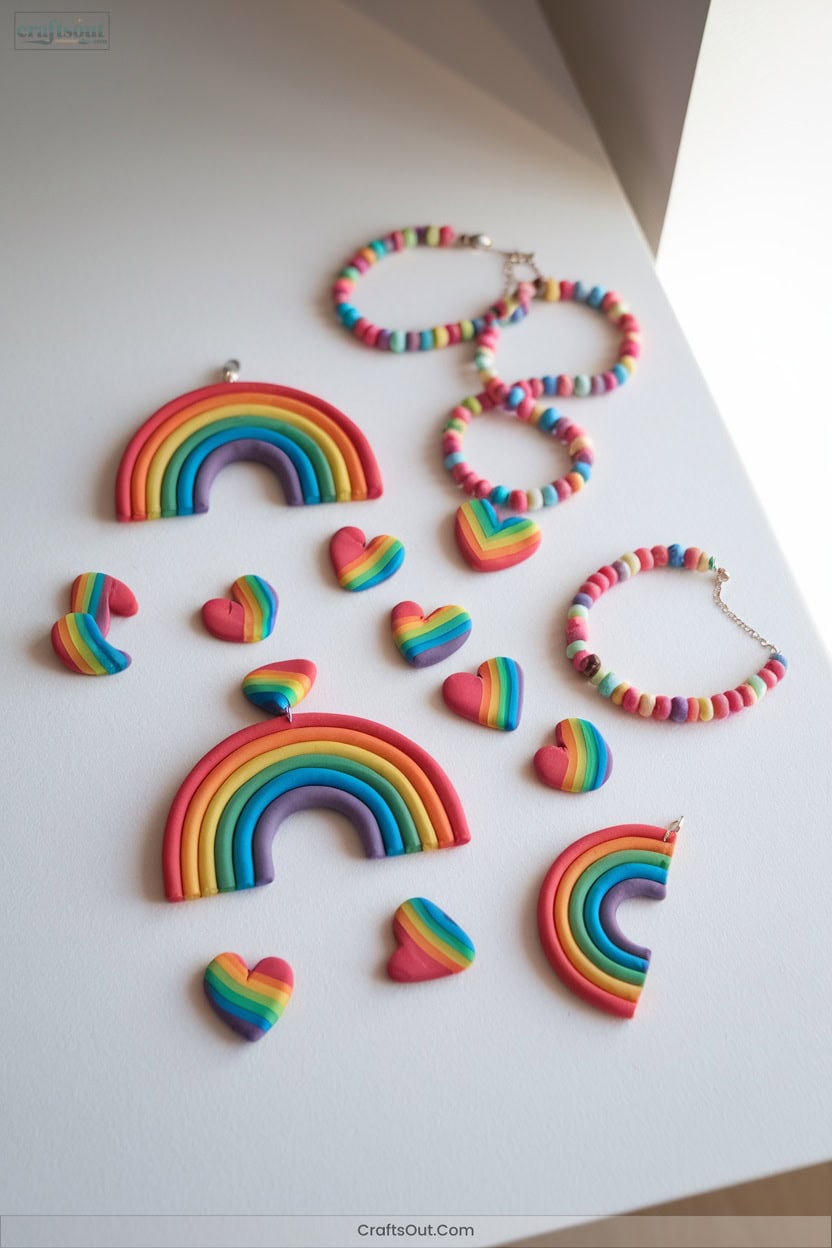
Once you’ve crafted enchanting elf doors, try making your own clay jewelry and pendants to wear or share.
Start by gathering polymer clay, a rolling pin, cutters, and your favorite colors.
Roll and flatten the clay, then use cutters for creative shapes.
Experiment with marbling by twisting two colors together.
Poke a hole for stringing, then bake your pieces with adult supervision.
Once cool, paint or seal for a polished look.
Attach jump rings and clasps to finish.
Let your creativity shine with these innovative ideas:
- Swirly marbled pendants
- Bold geometric necklaces
- Shimmery mixed-media charms
20. Colorful Clay Mosaics

Explore into the world of colorful clay mosaics by pressing small pieces of air dry clay onto a sturdy surface like wax paper or cardboard.
First, roll clay flat and cut it into shapes—try leaves, squares, or circles.
Add beads, foam squares, or rocks for texture.
Use toothpicks or craft sticks to make patterns.
Paint or use oil pastels for extra color.
Want more depth? Layer clay for a raised effect.
Work with friends for collaborative designs or explore cultural mosaic patterns.
Each creation boosts fine motor skills, sparks creativity, and encourages self-expression.
Your mosaic is truly one-of-a-kind!
Frequently Asked Questions
What Type of Clay Is Safest for Young Children to Use?
You should choose air dry or water-based clays for young children. They’re non-toxic, easy to shape, and safe. Always check for allergies and supervise. Wash hands after use, and let kids explore their creativity confidently!
How Can You Store Leftover Clay to Prevent It From Drying Out?
To keep your leftover clay fresh, wrap it tightly in plastic wrap, seal it in an airtight container or Ziploc bag, and store it somewhere cool and dark. Check it often—if it dries, rehydrate with a damp towel.
Are There Allergy Concerns With Certain Clay Ingredients?
Allergies can lurk like hidden cracks in clay. You’ll want to check ingredients, wash your hands after crafting, and supervise kids closely. If you spot redness or rash, stop use and ask your doctor’s advice.
What Tools Are Best for Kids to Shape and Cut Clay?
You’ll want to start with plastic cutters and rollers—they’re safe and easy to handle. Try shape cutters for creativity, and molding tools for details. Always use blunt tools, and don’t forget to wash your hands after crafting!
How Do You Clean Clay Stains From Clothing or Surfaces?
Of course, everyone loves a good clay stain! But don’t worry—just let it dry, brush it off, rinse with cold water, treat with detergent or vinegar, and wash as usual. You’ll innovate messes into masterpieces!
Conclusion
Now you’ve got clay at your fingertips and a world of ideas up your sleeve! Jump in, follow these simple steps, and let your creativity shine. Don’t worry about making things perfect—the fun is in trying. Whether you make a tiny animal face or a magical gnome door, you’ll learn as you go. Gather your supplies, pick a project, and watch your skills grow. The sky’s the limit when you craft with clay!


