
10 Fun Air Dry Foam Clay Crafts for Beginners
With air dry foam clay, you can easily craft cute animal figures, miniature foods like donuts, fun character sculptures, and colorful hearts or stars. Roll out shapes, use cookie cutters, and mix colors for marbled effects or add glitter for sparkle. Experiment with different techniques like molding or layering to create unique designs. You can also find inspiration online for adorable clay craft ideas that will elevate your creations even further. Whether making gifts or decorations, the possibilities are endless
Make magnets, jewelry, or decorate frames, and even build mini pots and keychains. Just shape, attach details with water, let pieces dry, then decorate. There’s a whole world of simple foam clay creations you can try next!
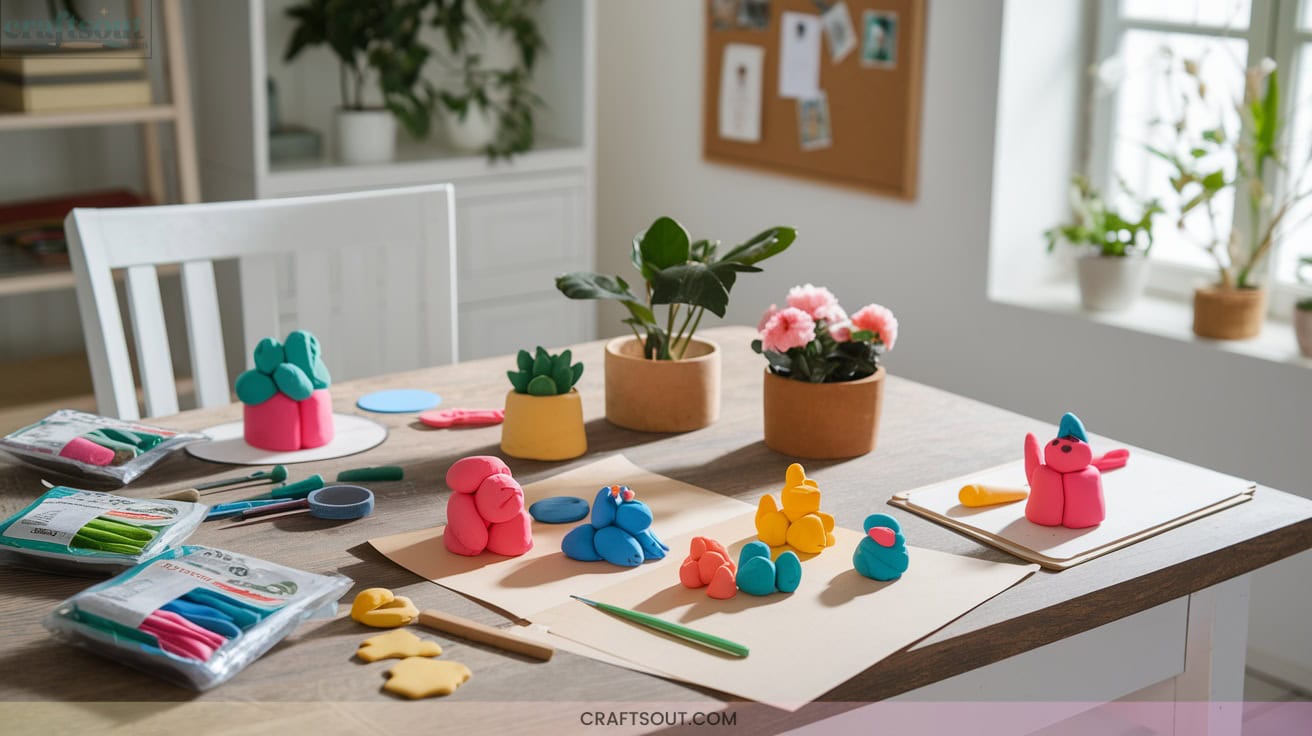

10 Fun Air Dry Foam Clay Crafts for Beginners: With air dry foam clay, you can easily craft cute animal figures, miniature foods like donuts, fun character sculptures, and colorful hearts or stars. Roll out shapes, use cookie cutters, and mix colors for marbled effects or add glitter for sparkle.
1. Make Your Own Cute Animal Figures

Ready to jump in and make your own adorable animal figures?
Start by kneading soft, stretchy air dry foam clay—if it feels dry, add a touch of water. Set up a non-stick surface like wax or silicone paper.
Grab colorful clay and shape basic forms: spheres for heads, cones for tails, logs for legs.
Attach limbs using the score and slip method (scratch, dampen, press). Smooth with wet fingers or a soft brush.
Innovate textures using toothpicks or craft knives. Add eyes, ears, and tails with simple shapes. Let your creation dry in a cool, ventilated space—innovation meets cuteness!
2. Sculpt Miniature Food Delights

Curious how to turn foam clay into tiny, tempting treats? Start by conditioning your clay—knead it until smooth and pliable.
Begin every project by kneading your foam clay until it’s silky-smooth and ready to sculpt into tiny treats.
Choose vibrant colors or mix your own with pigments for added realism.
Sculpt classic mini foods: donuts, burgers, or strawberries using simple shapes—roll, flatten, and pinch as needed.
Layer separate elements, joining with a dab of PVA glue.
Texture surfaces with a toothbrush or needle tool for a lifelike finish.
Once dry, enhance details with acrylic paint, and seal your masterpiece with a glossy varnish.
Attach findings to create playful accessories, from keychains to earrings, and showcase your delicious innovation!
3. Craft Whimsical Character Sculptures

After shaping tiny treats, it’s time to bring playful characters to life with foam clay.
Start by kneading your clay for flexibility, then try these steps for creative, one-of-a-kind figures:
- Shape the basics: Roll spheres, cones, and coils for heads, bodies, and limbs—layer and join using a dab of water.
- Add whimsy: Sculpt animals, chibi figures, or quirky monsters; push in googly eyes, shape noses, and add texture with toothpicks.
- Detail and finish: Attach accessories like hats or bows, make sure limbs are sturdy, and let your creation air-dry completely before painting or sealing.
4. Shape Colorful Hearts, Stars, and Clouds

Brighten up your foam clay crafting by shaping cheerful hearts, stars, and clouds—perfect for beginners and fun for all ages.
Start by kneading the clay until it’s soft and pliable.
Roll it out evenly on a non-stick surface using an acrylic rolling pin.
Use cookie cutters for crisp heart, star, or cloud shapes, or get creative and mold them freehand.
Combine colored clays for marbled effects or knead in paint for custom shades.
Add glitter or tiny embellishments to wet clay for extra flair.
Let your shapes dry fully on a rack, flipping occasionally, for smooth, vibrant results.
5. Design Adorable Fridge Magnets

Once you’ve mastered shaping playful hearts, stars, and clouds, you’re ready to turn your foam clay creations into charming fridge magnets.
Grab your air-dry foam clay, magnets, strong adhesive, and sculpting tools.
To get started, try these three steps:
- Sculpt fun shapes: Think woodland animals, breakfast foods, or tiny objects—combine colors for added flair.
- Let them dry: Air dry your pieces for at least 24 hours, then decorate with acrylic paint or markers.
- Attach the magnet: Glue a magnet to the back, ensuring a secure hold. Now you’ve got innovative, personalized magnets for your fridge!
6. Create Foam Clay Flower Decorations

Transform simple foam clay into beautiful flower decorations by gathering a few colors, your favorite sculpting tools, and some basic accessories like wire for stems.
Turn colorful foam clay and basic tools into lovely flower decorations—perfect for adding a handmade touch to your space.
Start by mixing colors to create unique shades.
Shape petals using tools such as knives or chopsticks, then form small clay balls for the centers.
Add texture by pressing or marking with various tools.
Attach petals around the center and use wire to support each flower.
Let your creations dry on a soft surface.
Once dry, arrange your flowers for wall art, mirror frames, or thoughtful gifts.
Experiment, practice, and let your creativity blossom!
7. Build Mini Pots and Trinket Dishes
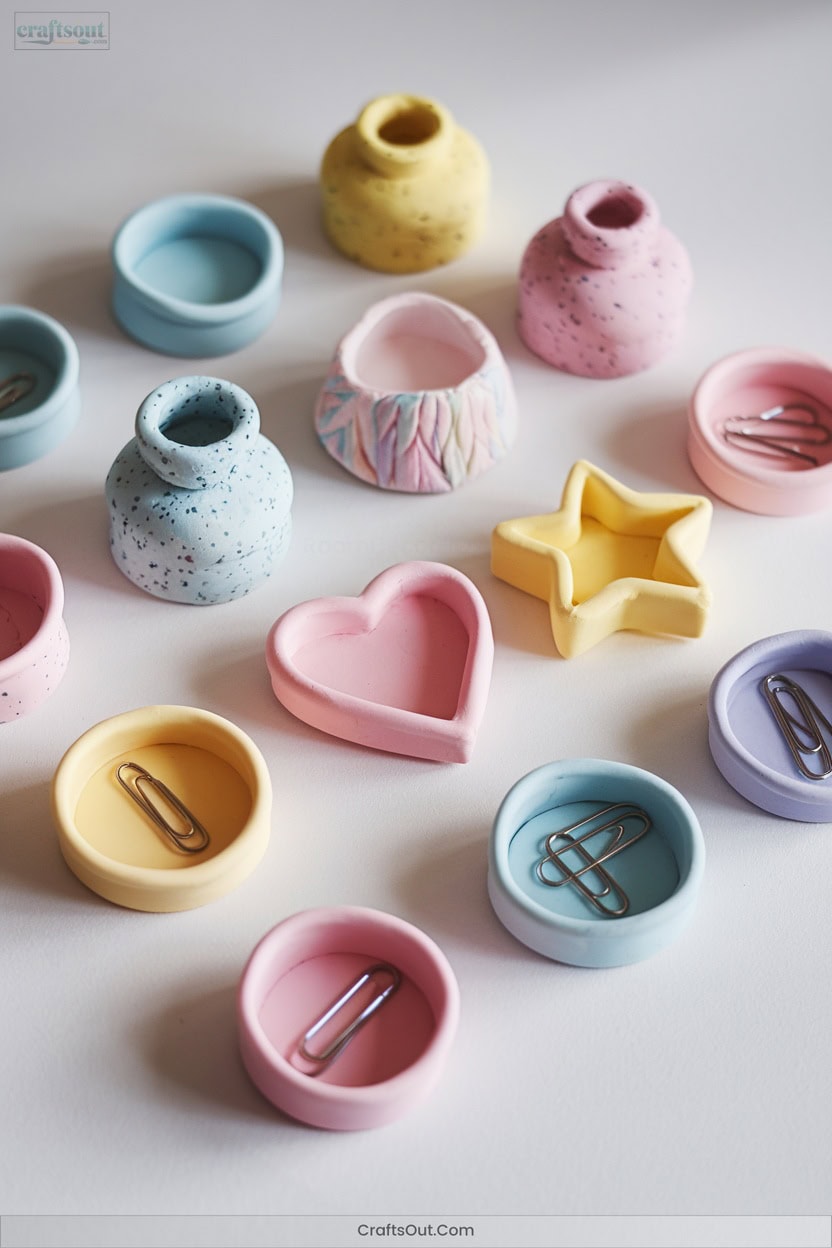
Curious about how to make your own mini pots and trinket dishes with air dry foam clay? Start by rolling out your clay evenly on a silicon mat. For mini pots, wrap your clay around a small bottle, score the edges, and smooth with water. For dishes, use a plate as a guide and shape the clay, smoothing edges with a damp finger. To innovate:
- Experiment with textures using found objects.
- Mix in paint or colorants for custom hues.
- Finish with sealant and creative decorations.
Let your creations dry fully before using them as planters, organizers, or display pieces!
8. Decorate Picture Frames and Mirrors

Picture frames and mirrors become one-of-a-kind art pieces when you decorate them with air dry foam clay.
Start by kneading and rolling out your clay, then press it into your chosen frame shape—oval, rectangular, or something unique.
Smooth the edges and use your fingers to add borders or indentations.
Let the clay dry fully, flipping occasionally.
Once dry, paint your frame using bold acrylics, blend custom colors, and let it dry again.
Personalize with pressed beads, floral motifs, or themed clay charms like Cinnamoroll.
Finally, seal your masterpiece with gloss varnish, ensuring both vibrancy and durability for your innovative creation.
9. DIY Lightweight Jewelry Pieces

Ever wondered how to create unique, lightweight jewelry right at home? Air dry clay and foam clay make this creative journey accessible to everyone, even beginners. Start by flattening your chosen clay with a rolling pin, then use cookie cutters for perfect shapes. Dry your pieces on a foam mat for even results. Here’s how to innovate:
- Experiment with both air dry and foam clay for different weights and textures.
- Paint, varnish, or add embellishments after drying to personalize each piece.
- Assemble with threads or chains to finish your bespoke creations.
Let your imagination lead the way!
10. Personalize Keychains and Bag Charms

Wondering how to make your own eye-catching keychains or bag charms?
Start by rolling out air dry clay, like Creative Paperclay, to about 1/4” thickness. Use shape cutters for bold forms—think geometric, animal, or monogrammed designs. Press in patterns or letters for custom details.
Roll out air dry clay to 1/4” thick, then use cutters and pressed patterns for bold, personalized shapes and designs. Experiment with different textures and colors to elevate your creations, ensuring each piece reflects your unique style. These pieces can be transformed into beautiful decorative items, making them perfect for adding personality to your space. Embrace the joy of creating aesthetic clay crafts for decor that will impress both you and your guests. Additionally, you can explore various easy air dry clay projects, such as making charming coasters or unique jewelry dishes. These versatile creations not only serve a functional purpose but also act as stunning conversation starters. Let your imagination run wild as you discover endless possibilities with air dry clay, turning everyday items into artistic expressions. Consider making functional items like plant pots or small trays, combining beauty with practicality. There are endless possibilities when exploring creative air dry clay projects, so let your imagination soar and try new techniques. Whether you’re crafting gifts or decorative pieces, these projects will surely inspire and delight.
Once shaped, let pieces dry for 48 hours.
Paint with Mont Marte colors and add embellishments like tassels or pressed flowers.
After drying, assemble with eyepins, jump rings, and keychains.
Seal with Mont Marte varnish or UV resin for durability.
Don’t forget to dry in a well-ventilated area for a professional, innovative finish.
Frequently Asked Questions
How Do You Properly Store Unused Foam Clay to Prevent Drying Out?
To keep unused foam clay fresh, seal it in airtight containers or plastic bags, add a few drops of water, and store it in a cool place. Get creative—try vacuum sealing for next-level preservation and innovation!
Is Foam Clay Safe for Young Children and Pets?
Err on the side of caution—always supervise young children and keep pets at a safe distance. You’ll find foam clay’s non-toxic formula reassuring, but avoid ingestion and small parts. Embrace creativity, but prioritize everyone’s well-being throughout.
Can You Mix Different Colors of Foam Clay Together?
Yes, you can mix different colors of foam clay together. Start by kneading small pieces, then blend them to create new shades or marbled effects. Don’t be afraid to experiment—innovation often leads to unexpected, beautiful results!
What’S the Best Way to Fix Cracks or Mistakes After Drying?
Think of cracks as opportunities in disguise. First, gently moisten the area. Mix slip from clay and water, then fill the crack. Smooth it out, let it dry, sand lightly, and finish strong with a protective seal.
How Do You Waterproof Finished Foam Clay Projects?
To waterproof your finished foam clay projects, start by applying thin coats of varnish or UV resin. Let each layer dry fully. Don’t forget edges. Experiment with different sealants—you’ll discover which method works best for your innovative creations!
Conclusion
You’ve learned nine fun foam clay crafts, but don’t put your clay away just yet—there’s still one more project waiting for you to discover! Gather your supplies, pick your favorite colors, and let your imagination run wild. This final project is the perfect opportunity to experiment with different shapes and textures. For inspiration, check out some exciting DIY modeling clay project ideas to take your creations to the next level. Whether it’s whimsical sculptures, practical items, or decorative pieces, there’s no limit to what you can create!
Step by step, you’ll shape, sculpt, and surprise yourself with what you can create. So, what will you make next? The possibilities are endless, and your final masterpiece might just be your best one yet. Ready for the big reveal?


